
E-MU Proteus Custom
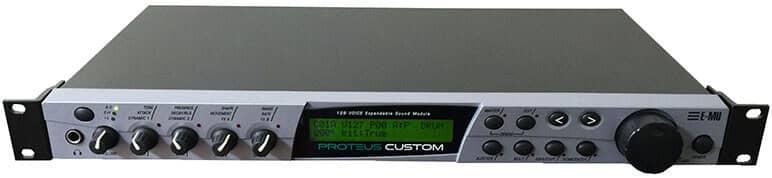
After years of aggressively painting faceplates purple, yellow, and blue, and endlessly debating Y2K marketing buzzwords, E-MU apparently just threw their hands up and said, “Fine, you build it.”
The E-MU Proteus Custom was the exact same uncompromised flagship Proteus 2000 engine you already know and love, but it arrived at your studio as a glorious, blank sonic canvas. It was the absolute peak of bespoke hardware before everyone just gave up and bought a laptop.
Here is how you ordered at the E-MU deli counter:
The Unrestricted Engine: You get the almighty 128-voice polyphony, the NASA-grade 32-bit processor, and the massive array of audio outputs. There are absolutely no budget cuts here.
Choose Your Own Adventure: You were no longer forced to accept whatever musical diet E-MU chose for you. You got to pick the expansion ROMs yourself. If you wanted to violently smash the pristine Orchestral Sessions string section right next to the sweaty rave noises of the Orbit-3, no one was going to stop you.
The Final Boss Flex: If factory presets were completely beneath you, there was another option. Using an E4 Ultra sampler, you could format and burn your very own custom sample banks onto a blank Flash ROM and jam it directly into the Proteus. This was the Y2K hardware equivalent of coding your own software from scratch in a cave.
It was the ultimate modular playground for producers who knew exactly what they wanted and refused to settle for a pre-packaged genre box.
TECHNICAL SPECIFICATIONS
SIMM Sockets: 4
SuperBEATS Mode: No
Polyphony: 128 Voices
MIDI Channels: 32
Filters: 50 Z-Plane
FX: 76
MIDI Ports: 5
Audio Outs: 6
Digital Outs: S/PDIF
Downloads
E-MU Proteus 2000 Operation Manual Rev. E
E-MU Proteus 2000 v1.10 Addendum
E-MU Proteus 2000 Data Sheet
Proteus Family SysEx 2.2 Specification
Proteus Version 2.26 OS Upgrade (128-Voice)
E-Loader Version 1.1 (PC)
E-Loader Version 1.1 (Mac)
E-Loader Operation Manual
Factory Reset & Diagnostics
This procedure destroys any presets stored in RAM.
1. Hold both Cursor (< >) buttons down and power on the unit.
2. Once booted up into the Diagnostics menu, turn the Data Wheel knob to Initialize User Data.
3. Press the Home/Enter button.
4. Press Home/Enter again to confirm.
5. Turn the unit off, wait a few seconds and turn the unit on.